3 Best Baby Bottle Sterilizers of 2026
Discover everything you need to know about sterilizing baby bottles. Find expert tips, detailed comparisons, and practical advice to make the right choice.
Updated for 2026 — This article has been reviewed and updated with the latest recommendations. Sterilizing baby bottles eliminates bacteria, viruses, and fungi that soap and water alone may not remove. For newborns and infants with developing immune systems, proper sterilization provides an extra layer of protection. The best bottle sterilizers in 2026 make the process fast and
Updated for 2026 — This article has been reviewed and updated with the latest recommendations.
Sterilizing baby bottles eliminates bacteria, viruses, and fungi that soap and water alone may not remove. For newborns and infants with developing immune systems, proper sterilization provides an extra layer of protection. The best bottle sterilizers in 2026 make the process fast and effortless.
Quick Comparison
| Sterilizer | Method | Capacity | Cycle Time | Drying | Price |
|---|---|---|---|---|---|
| Philips Avent Premium Sterilizer | Steam | 6 bottles | 6 min | Built-in dryer | $100 |
| Baby Brezza One Step Sterilizer Dryer | Steam | 6 bottles | 8 min | Built-in dryer | $85 |
| Wabi Baby Electric Sterilizer | UV + Steam | 8 bottles | 5 min | Built-in dryer | $120 |
1.
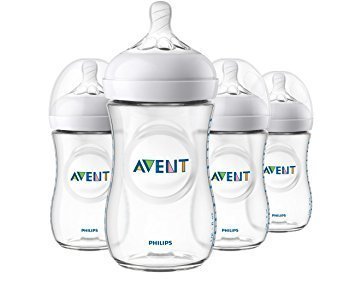
Philips Avent Premium Steam Sterilizer with Dryer
The Avent Premium combines sterilization and drying in one machine, which eliminates the step of laying bottles out to air dry on the counter. The steam cycle takes six minutes, and the drying cycle runs automatically afterward. Contents stay sterile for up to 24 hours if the lid stays closed.
The capacity handles six bottles along with nipples, rings, and pump parts.
It works with all major bottle brands, not just Avent. The removable water reservoir makes filling easy without needing to carry the whole unit to the sink.
At $100, the built-in dryer is the main selling point. No more waiting for bottles to air dry.
2. Baby Brezza One Step Sterilizer Dryer Advanced
Baby Brezza designed this sterilizer to be dead simple.
Load the bottles, press one button, and the machine sterilizes and dries automatically. The eight-minute cycle is slightly longer than the Avent but still fast enough to run between feedings.
The natural air drying system is gentler than heated drying, which some parents prefer. The unit is compact and does not take up as much counter space as the Avent. At $85, it offers the core functionality at a lower price point.
The design accommodates wide-neck and narrow bottles equally well, which matters if you use different bottle types.
3. Wabi Baby Electric Steam Sterilizer and Dryer Plus
The Wabi adds UV sterilization on top of steam for a dual-action approach. The UV step provides an extra level of disinfection that targets bacteria and viruses that steam alone might miss.
The five-minute steam cycle is the fastest here, and the UV step adds a few more minutes.
Capacity is the largest at eight bottles, which is helpful for parents who batch-sterilize once or twice a day. The HEPA filter in the drying system ensures clean air reaches the bottles during the drying cycle.
At $120, it is the most expensive option but provides the most thorough sterilization.
Pediatricians often recommend UV sterilization for premature babies or those with immune concerns.
When Do You Need to Sterilize?
Sterilize bottles before first use out of the box. For ongoing use, the CDC says daily sterilization is recommended for babies under three months, premature infants, and immunocompromised babies. For healthy babies over three months, thorough washing with hot soapy water and a bottle brush is generally sufficient, though many parents continue sterilizing for peace of mind.
Sterilization Methods Compared
Steam: The most common method.
Effective and chemical-free. Requires distilled or filtered water for best results.
UV: Uses ultraviolet light to kill microorganisms. Dry process that requires no water. Effective against a broader range of pathogens than steam alone.
Boiling: The free method. Submerge bottles in boiling water for five minutes. Works fine but is manual and inconvenient.
Final Thoughts
The Philips Avent Premium is the best overall sterilizer with its fast cycle and built-in dryer.
The Baby Brezza offers similar core functionality at a lower price. And the Wabi Baby is the premium pick with dual steam and UV sterilization for maximum protection.
The methodology, in full.
Every Product Rankers roundup follows the same five-step process. We publish our testing plan before we begin and update it publicly when methods change.